Intro
On most jobs, clients ask, “What will it cost and how long?” That’s hard to answer from a few photos. Watch This Video To Learn More About Home Renovation, then use this guide to turn what you see into clear steps, a fair price, and a solid plan. We’ll show you what to record, how to spot risks, and how to turn a walkthrough into a proposal fast. Simple process. Real examples. Fewer surprises.
Quick Answer
Watch This Video To Learn More About Home Renovation, then follow a short checklist: record a 5–10 minute room‑by‑room pass, capture key measurements, note utilities, and list risks. Convert that into a scope, timeline, and budget with 10–15% contingency. Finally, send a clean proposal and get it signed.
Table of Contents
Key Takeaways
- Film 5–10 minutes per flat or floor; 30–60 seconds per room.
- Capture 8–10 key measurements: room sizes, openings, ceiling height, services.
- Allow 10–15% contingency for unknowns behind walls and floors.
- Plan 2 site visits: one to scope, one to verify before ordering materials.
- Convert the video to a written scope within 24 hours to keep momentum.
Why This Video Works for Renovation Planning
A short video shows what still photos miss. You catch uneven floors, cracked plaster, tight stair turns, and awkward corners. You also hear things: a noisy fan, a dripping valve, a humming consumer unit.
Watch This Video To Learn More About Home Renovation, then use what you see to build a clear scope. You’ll avoid “we didn’t see that” moments. Most contractors find a video cuts back‑and‑forth by half and speeds decisions.
If you’re also looking to streamline professional proposals, our guide covers picking layouts that clients accept quickly. This pairs well with understanding project timelines so you can schedule trades in the right order.
How to Use the Video: The 7-Step Checklist
Follow these steps right after you Watch This Video To Learn More About Home Renovation. Keep it simple and repeatable.
- Walk the outside first
- Film drains, downpipes, vents, brickwork, roofline, and access. Note any 600–800 mm clear paths needed for skips and deliveries.
- Go room by room
- 30–60 seconds each. Pan slowly. Capture floor to ceiling (typical 2.3–2.5 m). Show windows, doors (commonly 762 mm), radiators, and sockets.
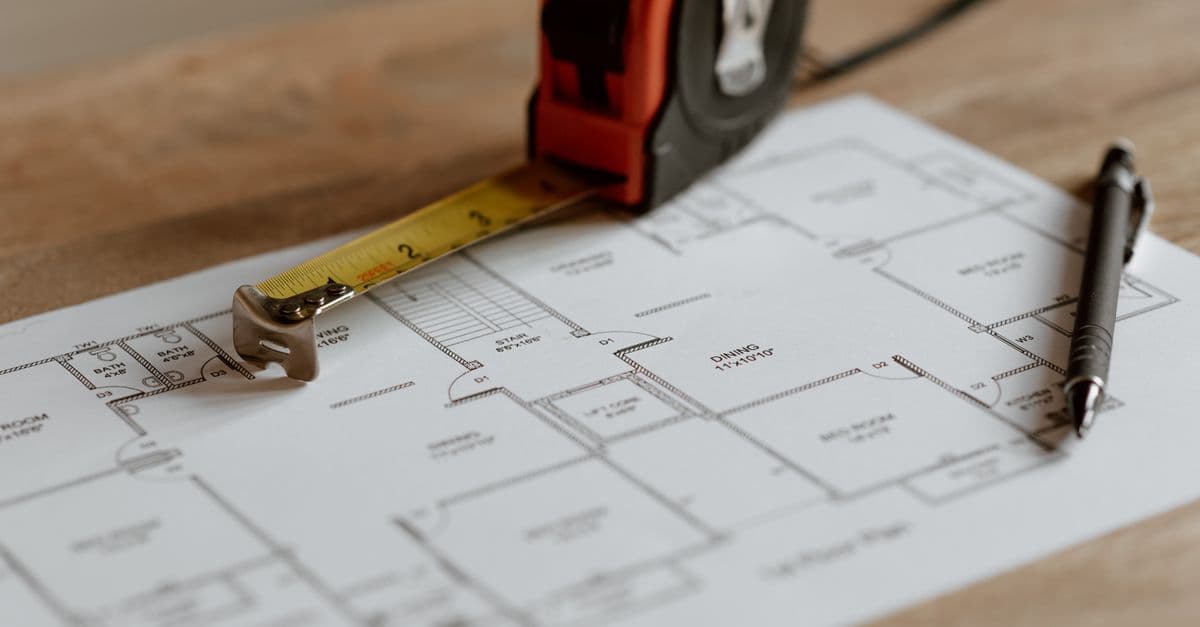
- Measure the essentials
- Record length and width (e.g., 3.0 m x 4.2 m). Note window sizes and sill heights. For tiling, confirm straight walls and bath/shower set‑outs at 150/300/600 mm.
- Check services
- Water stop tap location, boiler model, consumer unit rating, gas metre, waste runs. Test two sockets with a plug‑in tester. Run taps for 20–30 seconds.
- Find risks early
- Damp patches, hairline cracks, blown plaster, uneven floors (use a 1.2 m level), rotten sills, asbestos‑suspect boards (don’t disturb). Note tight stair widths under 800 mm for material handling.
- List client wishes on the spot
- Capture 3–5 key wishes in the audio: “Keep coving,” “Hide pipes,” “Matte finish,” “Noise reduction,” “Warm floor.”
- Summarise in 60 seconds
- At the end, say the room names, main works, and any provisional sums you expect. This one minute saves 20 messages later.
When you Watch This Video To Learn More About Home Renovation, follow this 7‑step list. It keeps your scoping fast and consistent.
Budget, Scope, and Hidden Costs You’ll Spot
A good video helps you price what’s real, not what’s guessed.
- Build the scope
- Split by trade: strip‑out, carpentry, plastering, plumbing, electrical, tiling, painting. Add a brief method for each. Keep steps short and clear.
- Add quantities
- Square metres for flooring and plaster (m²), linear metres for skirting (e.g., 120 mm profiles), item counts for doors, sockets, lights. Aim for 5–8 key quantities per room.
- Plan the sequence
- Typical order: demo → first fix → board/plaster → second fix → finishes → snagging. Mark 1–2 days for drying time between wet trades.
- Allow for hidden work
- Old joists at 400 mm centres may be out of level. Old wiring without earth needs a rewire. Galvanised waste may crumble. Add a 10–15% contingency line.
- Timeframes clients understand
- Small bathroom: commonly 10–15 working days. Full 3‑bed refurb: 6–10 weeks. State lead times: kitchens 2–4 weeks, windows 3–6 weeks.
You’ll spot many of these items the moment you Watch This Video To Learn More About Home Renovation. Note them before you price.
Turn Walkthroughs Into Proposals and Invoices
Once the video is done, create paperwork fast while details are fresh. Many workers find that within 24 hours is best.
- Convert to a proposal
- Use room‑by‑room headings. List 5–7 bullet points per room. Add start date window (e.g., 2–3 weeks from approval) and payment stages.
- Get it approved
- Clients decide faster when the scope matches what they saw in the video. Include photos or stills to back up allowances.
- Tools that speed this up
- Platforms such as Donizo let you speak your notes (Voice to Proposal), generate a branded PDF (Send Proposal), collect a digital signature (E‑signature Integration), and, when accepted, convert it to an invoice in one click (Invoice Management).
If you’re dealing with change orders later, this pairs well with a clear paper trail. For contractors who need invoice templates that save time, look for simple, itemised layouts that match your scope.
Watch This Video To Learn More About Home Renovation: Pro Tips
Use these quick wins every time you Watch This Video To Learn More About Home Renovation.
- Film at chest height. Keep the phone level. Avoid fast pans.
- Talk as you go. Say sizes out loud. Name problems and options.
- Take 3–5 photos per room for drawings and tile set‑outs.
- Record ceilings clearly for light positions and joist direction if visible.
- Note access: stair width, parking limits, lift size, and working hours.
- Get permission to film. Keep people and personal photos out of frame.
- After filming, write the scope while it’s fresh. Aim for 45–90 minutes.
- Share the video link with the client and your team. One source of truth.
Every time you Watch This Video To Learn More About Home Renovation, stick to these habits. They make jobs smoother and reduce disputes.
Conclusion
Videos cut guesswork. When you Watch This Video To Learn More About Home Renovation, you capture the real site, spot risks, and turn it into a clean plan. Next steps: 1) Film a 5–10 minute walkthrough, 2) Write a room‑by‑room scope within 24 hours, 3) Add a 10–15% contingency and clear milestones. If you want to speed proposals and sign‑offs, platforms such as Donizo turn spoken notes into branded, signable documents fast. Keep it simple, stay consistent, and your jobs will run smoother.