Intro
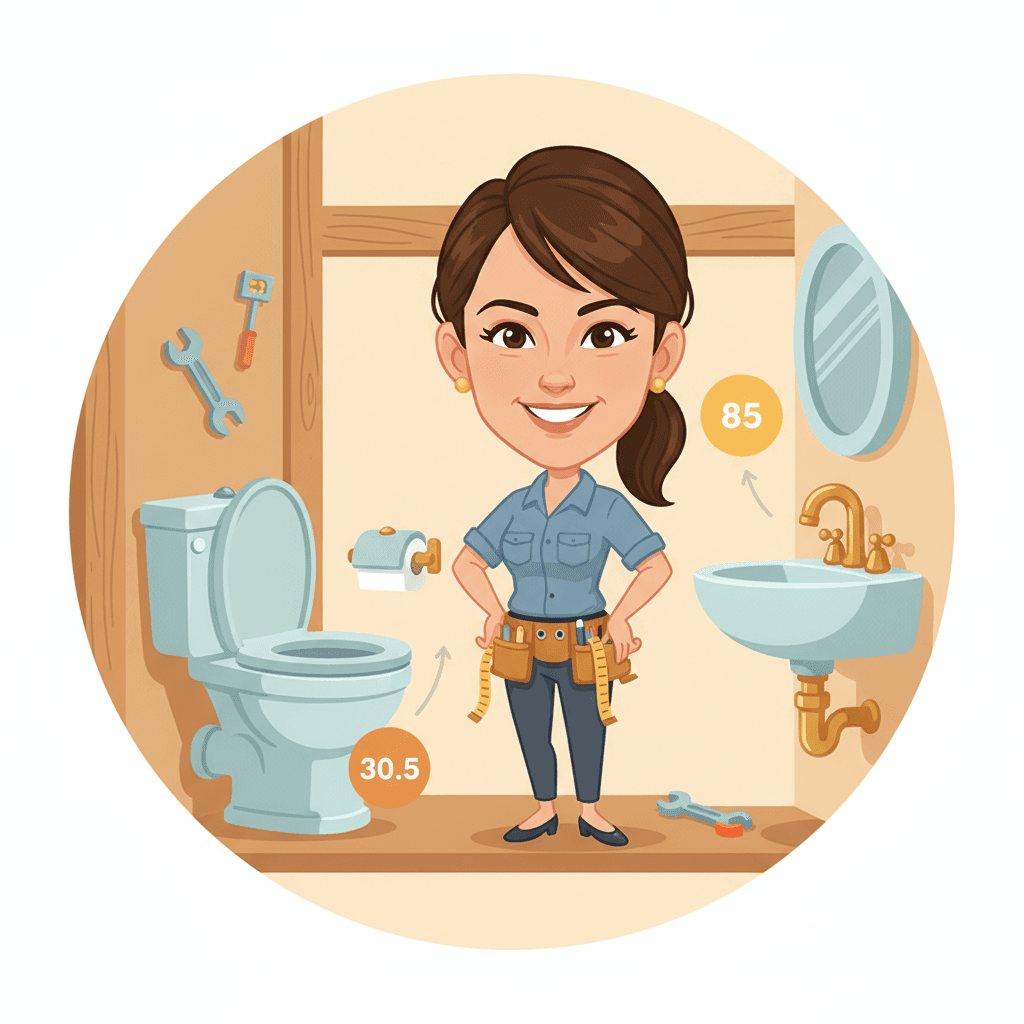
Most clients want a simple rule: set the toilet rough-in at 30.5 cm (12 in) and the sink rim at 85 cm (33.5 in). Many even search for “Medidas exactas para un baño perfecto! WC a 30.5cm y lavabo a 85cm.” Here’s the clear guide. We explain what those numbers mean, why they work, and how to hit them every time. Use these steps to prevent rework, pass inspections, and keep customers happy.
Quick Answer
For a standard bathroom, center the toilet drain at 30.5 cm (12 in) from the finished wall. Set the sink rim at 85 cm (33.5 in) above the finished floor. Keep at least 38 cm (15 in) from the toilet centerline to each side wall and 61–76 cm (24–30 in) of clear space in front.
Table of Contents
Key Takeaways
- WC rough-in: 30.5 cm (12 in) from finished wall to drain center.
- Sink height: 85 cm (33.5 in) from finished floor to rim for most users.
- Side clearances: 38 cm (15 in) minimum from WC centerline to each side.
- Front clearance: 61–76 cm (24–30 in) clear in front of WC and sink.
- Plan with finished surfaces. Tile adds 8–12 mm (5/16–1/2 in) fast.
Plan It Right (Finish-Ready Layout)
On most jobs, errors start at framing. You measure from studs, not the finished wall. Then tile adds 10 mm, and the toilet won’t fit. Don’t make that mistake.
- Always plan from finished surfaces. Include drywall, tile, wainscot, and base.
- Confirm door swing. A 76 cm door can block the WC if you misplace it.
- Check vanity depth. Common tops are 46–51 cm (18–20 in) deep.
- Note trim thickness. Even 15–20 mm of baseboard can push clearances.
Pro tip: Mark a “finish line” on the slab or subfloor. Write down exact layers and thicknesses. It takes 5 minutes and can save hours.
WC at 30.5 cm: What, Why, How
The standard rough-in is 30.5 cm (12 in) from the finished wall to the drain center. Most modern toilets are built for this. Some models use 25 cm (10 in) or 35.5 cm (14 in), but 12 in is the default.
Why it works:
- It centers the bowl in most layouts.
- It keeps the tank off the wall without a gap.
- It matches stock flanges and wax rings.
How to hit it:
- Measure from the finished wall, not the stud.
- If you have tile, add its thickness and thinset. Commonly 8–12 mm total.
- Place the flange so the top sits on the finished floor.
- Use closet bolts at 14 cm (5-1/2 in) on-center across the flange slots.
Clearances for code and comfort:
- Side clearance: 38 cm (15 in) minimum from centerline to any side wall or cabinet. Many pros aim for 40–41 cm (16–16-1/8 in) for wiggle room.
- Front clearance: 53 cm (21 in) minimum by many codes; 61–76 cm (24–30 in) feels right for adults.
Exact Bathroom Measurements (Medidas exactas para un bano perfecto)
If the client asks for the “exact” setup, keep it simple and consistent:
- Toilet rough-in: 30.5 cm (12 in) to centerline from finished wall.
- Toilet seat height: 43–48 cm (17–19 in) to the top of the seat feels comfortable for most.
- Sink rim height: 85 cm (33.5 in) from finished floor.
- Mirror bottom: 97–102 cm (38–40 in) above floor.
- Faucet spout: 20–25 cm (8–10 in) above sink rim, centered on drain.
- Sink drain rough: 46–51 cm (18–20 in) above floor to trap arm center.
- Hot/cold supplies: 51–56 cm (20–22 in) above floor, 10–15 cm (4–6 in) apart, centered under basin.
These numbers fit most standard fixtures and save you from rework.
Sink at 85 cm: Setup and Options
The 85 cm (33.5 in) sink height lands well for most adults. It reduces back strain and lines up with common vanities.
Choose the style:
- Vanity with top: Set finished top at 85 cm. The sink rim matches the top.
- Wall-hung sink: Mount brackets so the rim finishes at 85 cm.
- Vessel sink: Lower the countertop to 76–81 cm (30–32 in) so the rim still lands at 85 cm.
Plumbing layout that works:
- P-trap center: 18–20 in (46–51 cm) above floor.
- Trap arm slope: 1/4 in per foot (2%) toward the wall.
- Supplies: 20–22 in (51–56 cm) above floor, valves aligned and accessible.
Accessibility note: For ADA-style installs, keep the sink rim at 34 in (864 mm) max, and protect knees under the basin. Many contractors build two heights in multi-bath homes.
Clearances That Prevent Callbacks
Clearances matter more than perfect numbers. Tight fits cause daily pain and complaints.
- WC side space: 15 in (38 cm) min from centerline to side obstacles. Aim 16 in (41 cm).
- Front space: 24–30 in (61–76 cm) clear in front of WC and sink.
- Towel bar: 48–52 in (122–132 cm) above floor. Keep near the sink.
- Toilet paper: 26 in (66 cm) above floor, 8–12 in (20–30 cm) in front of the bowl rim.
- GFCI outlet: 42–48 in (107–122 cm) above floor, 30–40 cm left or right of the sink center.
If you’re also looking to streamline professional proposals, our guide on creating professional proposals pairs well with this planning stage. It helps you confirm scope and avoid layout disputes. For contractors dealing with billing, look for invoice templates that save time after punch-out.
Step-by-Step: Mark and Install
Follow these steps to hit 30.5 cm and 85 cm on the first try. Plan 2–3 hours for layout and rough checks, and 1–2 hours for fixture set.
-
Confirm Finishes
- List all layers: drywall, backer, tile, thinset, baseboard.
- Add their thickness. Update the finish line.
-
Mark the WC Rough-In
- From the finished wall, mark 30.5 cm (12 in) to the drain center.
- Snap side clearances: 38 cm (15 in) each side from centerline.
-
Set the Flange
- Install so the flange top sits on the finished floor.
- Align closet bolts at 5-1/2 in (14 cm) on-center.
-
Place the Toilet
- Dry-fit first. Check tank-to-wall gap (6–10 mm looks clean).
- Set with a wax ring or seal. Tighten bolts gently.
-
Mark the Sink Height
- Draw a level line at 85 cm (33.5 in) finished height.
- For a vessel, lower the countertop so the rim still hits 85 cm.
-
Rough the Plumbing
- Drain center 18–20 in above floor. Supplies 20–22 in above floor.
- Keep supplies 4–6 in apart and centered.
-
Mount and Connect
- Set vanity or wall brackets. Level and anchor solid.
- Connect P-trap with 1/4 in/ft slope. Check for leaks.
Document and Hand Off
A clean handoff reduces callbacks. Take photos of measurements with a tape visible. Note heights on the punch list. Many contractors capture site notes and voice memos, then build proposals fast using tools like Donizo. You can record details on-site, send a branded proposal, get an e-signature, and convert to invoice when the client approves.
Conclusion
Hitting 30.5 cm for the toilet rough-in and 85 cm for the sink rim delivers a clean, comfortable bathroom. Plan from finished surfaces, protect clearances, and follow the steps above. Next moves: 1) Confirm all finish thicknesses, 2) Mark heights on walls before rough, 3) Photo-document final dimensions. To communicate scope fast and get approval, many pros use platforms such as Donizo to capture details, send proposals, and collect e-signatures. Lock in these measurements, and your installs will go smoother on every job.