Intro
On most jobs, the leak isn’t the real problem. Pressure is. The Secret Trick Plumbers Never Tell You! is a cheap 24-hour pressure gauge test that shows hidden spikes. Those spikes crack fittings, bang pipes, and wreck valves. In this guide, I’ll show you how the test works, what numbers matter, and what to install. It’s simple. You’ll use a $10–$20 hose-bib gauge with a max needle. Run it 24 hours. Read it once. Then fix the cause with a PRV, an expansion tank, and hammer arrestors. You’ll prevent callbacks and save your client money.
Quick Answer
The Secret Trick Plumbers Never Tell You! is a 24-hour gauge test. Screw a $10–$20 hose-bib pressure gauge with a max (tattle) needle onto a faucet, open it, and leave it 24 hours. If pressure sits above 80 psi or spikes more than 10–15 psi, add a PRV, size an expansion tank, and fit hammer arrestors.
Table of Contents
Key Takeaways
- The Secret Trick Plumbers Never Tell You! is a 24-hour gauge test.
- Ideal house pressure: 50–60 psi. Over 80 psi is a problem.
- Spikes over 10–15 psi point to PRV or expansion needs.
- The test takes 5 minutes to set up and 24 hours to run.
- Add a PRV and expansion tank to stop damage and callbacks.
Why Pressure Spikes Break Plumbing
High pressure is sneaky. It looks fine at noon, then jumps at 2 a.m. Street pressure swings. Thermal expansion pushes harder when a water heater fires. The result is banging pipes, running toilets, and dripping T&P valves.
- Code commonly limits static pressure to 80 psi max.
- Most fixtures live longest at 50–60 psi.
- A 10–15 psi swing can slam quick-closing valves.
- Just one overnight spike can reach 100–120 psi in closed systems.
You can’t fix what you don’t measure. That’s why The Secret Trick Plumbers Never Tell You! matters. It catches the worst moment without you standing there.
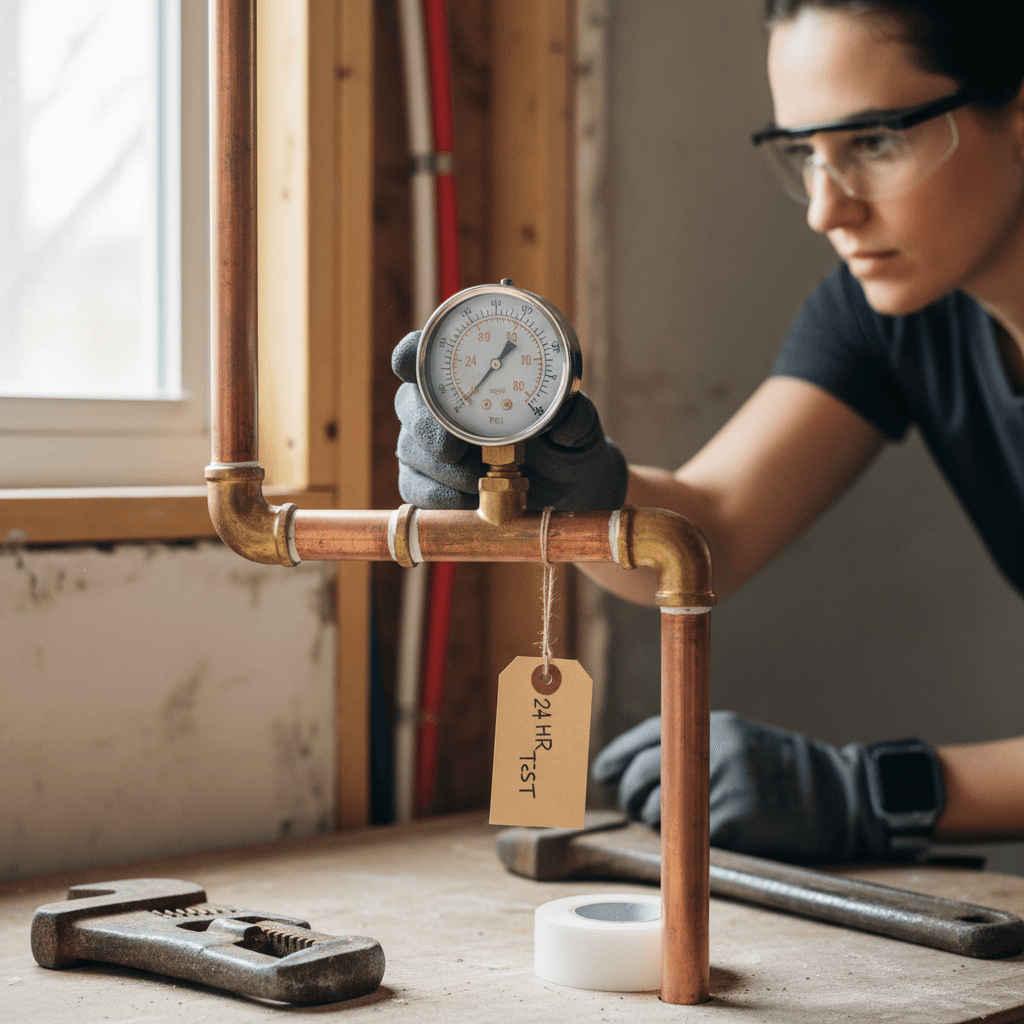
The Secret Trick Plumbers Never Tell You: 24h Gauge Test
This test uses a hose-bib pressure gauge with a max needle. That red needle records the highest spike until you reset it. It’s the plumber’s shortcut to the truth.
What you need:
- 1 hose-bib pressure gauge with a tattle needle (0–160 psi)
- 1 minute to purge air
- 24 hours of normal use in the home or unit
Run it once and you’ll know if you need a PRV, an expansion tank, or both. The Secret Trick Plumbers Never Tell You! saves guesswork.
Step-by-Step: Do the 24h Pressure Test
- Pick a faucet. Use an exterior hose bib or a laundry faucet after the meter.
- Hand-tighten the gauge. No pipe dope needed for a hose thread.
- Open the faucet fully. The gauge needs live pressure. If it hisses, let it settle.
- Tap the gauge. Clear air. Note the current pressure.
- Reset the max needle to current pressure. Most dials twist or use a thumb screw.
- Leave it 24 hours. Run the home like normal: showers, dishwasher, laundry.
- Read and record. Note both current and max pressure. Take a photo.
- Test again at a second point (optional). Upstream vs. downstream of any PRV.
Time: Setup takes about 5 minutes. The test runs 24 hours. If you need speed, 8 hours overnight still gives good data.
What the Numbers Mean and What to Install
Here’s how to read your results and act fast.
-
Current pressure 50–60 psi, max under 70 psi
- Status: Healthy. No action.
- Tip: Still add arrestors on new quick-closing valves.
-
Current 70–80 psi, max 85–95 psi
- Status: Borderline.
- Action: Install a PRV set to 55–60 psi. Consider an expansion tank if there’s a check valve or PRV already.
-
Current over 80 psi or max over 95–100 psi
- Status: Out of spec.
- Action: Install/replace PRV. Add a properly sized expansion tank. Re-test.
-
Max spike only after hot water runs (common)
- Status: Thermal expansion.
- Action: Expansion tank. Pre-charge the tank to match PRV setpoint.
Sizing and placement basics:
- PRV: 3/4 inch body for typical homes. Set 55–60 psi.
- Straight pipe: Leave 12–18 inches of straight pipe before/after PRV for accuracy.
- Expansion tank: Match heater size and pressure. Pre-charge 2 psi below PRV setting (example: PRV 60 psi, tank 58 psi).
- Straps: Secure copper every 6–8 feet horizontally to cut movement.
After install, repeat The Secret Trick Plumbers Never Tell You! the next day. You should see max pressure within 5–10 psi of your setpoint.
Pro Moves: Stop Water Hammer and Noise
Water hammer is that hard bang when a valve snaps shut. High pressure makes it worse. Fix the pressure first, then absorb the shock.
- Install water hammer arrestors at quick-closing valves: dishwasher, washer, ice maker.
- Use certified arrestors, not DIY air chambers. Air chambers waterlog.
- Secure lines every 6–8 feet. Add pads where pipes touch framing.
- Slow-close angle stops help. Quarter-turn valves can hit hard at 80+ psi.
- Flush debris. Run each line 30–60 seconds after work to clear grit.
Many contractors find these steps cut noise by half on day one. With correct pressure, most hammer vanishes.
Turn Findings Into Clear Proposals
Clients don’t argue with photos. Snap the gauge with current and max readings. Add the timestamp. Then lay out fixes: PRV, expansion tank, and arrestors.
- Show the cost of doing nothing: leaks, fixture failures, callbacks.
- Give a 2–3 line scope and 3 key parts. Keep it simple.
- Add a 12-month workmanship note to build trust.
If you want speed, capture notes by voice and attach photos using tools like Donizo. You can turn voice, text, and photos into a branded proposal, get e-signature, and convert it to an invoice in one click. This pairs well with content on professional proposals, project timelines, and invoice templates you may already offer readers.
Conclusion
Here’s the truth in one line: The Secret Trick Plumbers Never Tell You! is a simple 24-hour pressure test that reveals the real cause of leaks and noise. Run the test, set the PRV to 55–60 psi, add a matched expansion tank, and fit arrestors where needed. Next steps: 1) Buy a 0–160 psi gauge with max needle, 2) Test 24 hours, 3) Install fixes and re-test. If you want to package findings fast, platforms such as Donizo let you capture voice notes, add photos of gauge readings, send proposals for e-sign, and invoice in minutes. Do the test on your next call. You’ll prevent damage and stop callbacks.