Intro
On most jobs, speed and clean work matter. Skarkbite copper press fittings help you get both. They join copper with a battery press tool, not a torch. That saves you time in tight spaces and live buildings. In this guide, we explain what Skarkbite copper press fittings are, when to use them, and how to install them right. We also cover tools, testing, and real mistakes to avoid. Follow these steps and you’ll cut callbacks, finish faster, and keep margins safe.
Quick Answer
Skarkbite copper press fittings use an O‑ring and a metal sleeve that’s crimped with a press tool to make a permanent, leak‑tight joint. They’re fast, clean, and work well on 1/2 in, 3/4 in, and 1 in copper lines. Deburr, clean, mark insertion depth, align jaws, press, and pressure test.
Table of Contents
Key Takeaways
- Press saves time: Contractors often report saving 1–2 hours per job.
- Prep makes the seal: Cut square, deburr, clean, and mark depth every time.
- Typical sizes: 1/2 in, 3/4 in, 1 in, and 1‑1/4 in are common on site.
- Testing: Many pros test at 1.5× working pressure for 10–15 minutes.
- Ratings: Press copper systems are commonly 200 psi and up to 250°F; always check the data sheet.
What Are Skarkbite Copper Press Fittings?
Skarkbite copper press fittings are mechanical fittings for copper tube. A rubber seal (O‑ring) sits inside a metal sleeve. You slide the fitting on the tube and use a press tool to crimp the sleeve. That compresses the seal for a permanent connection.
- Works on common copper types (K, L, M). Check your local code.
- Common sizes: 1/2 in, 3/4 in, 1 in, and 1‑1/4 in.
- In general, systems like these are rated around 200 psi and up to 250°F. Always confirm the specific product sheet.
Skarkbite copper press fittings are designed for speed and clean installs. No flame. No flux. Less cleanup.
When To Use Skarkbite Copper Press Fittings
Use Skarkbite copper press fittings when you need fast, reliable joints without a torch.
Good Situations
- Live buildings where open flame isn’t allowed or is risky.
- Tight ceiling spaces with insulation or fireproofing.
- Night work and quick shutdowns on 10–20 ft runs.
- Potable water, hydronic heat, and general plumbing where press is approved.
When To Rethink
- Severely out‑of‑round or damaged copper that won’t gauge correctly.
- Lines with heavy scale or deep scratches in the seal zone.
- Systems above stated temperature/pressure rating. Always verify specs.
Skarkbite copper press fittings shine on service calls and retrofits. You can press with slight residual water in the line. That’s a big win vs solder.
Get your setup right before you start. It keeps your press count clean and speeds you up.
- Battery press tool (12V, 18V, or 20V class) with charged packs
- Jaws or rings that match your fitting sizes (1/2 in, 3/4 in, 1 in, 1‑1/4 in)
- Copper pipe cutter and reamer/deburring tool
- Depth gauge and a permanent marker
- Cleaning pad or nylon abrasive cloth (no sand that sheds grit)
- Calipers or go/no‑go gauge for tube roundness if needed
- Leak detector solution and a calibrated pressure gauge
Keep a spare O‑ring kit if your fittings allow replacement before pressing. If an O‑ring gets nicked, don’t gamble—swap the fitting.
Step-By-Step: How To Press Copper Fittings
Follow these exact steps for Skarkbite copper press fittings. Most contractors skip one of these. Don’t make that mistake.
- Plan The Route
- Dry fit your run. Count fittings. Check clearances for the press tool.
- Cut Square
- Use a sharp cutter. Keep end square within about 1/16 in. A clean cut helps the O‑ring seal.
- Deburr Inside And Outside
- Remove all burrs. Sharp edges cut O‑rings. Feel the edge with your finger. It should be smooth.
- Clean The Tube
- Use a nylon pad. Shine the insertion zone 1–1.5 in from the end. No oil, no grease.
- Mark Insertion Depth
- Use a depth gauge and mark the tube. Typical insertion depths are around 5/8 in for 1/2 in and 3/4 in for 3/4 in, but always verify. Your mark is your visual check.
- Check The Fitting
- Inspect the O‑ring. No nicks, no debris. If dirty, wipe with a clean cloth.
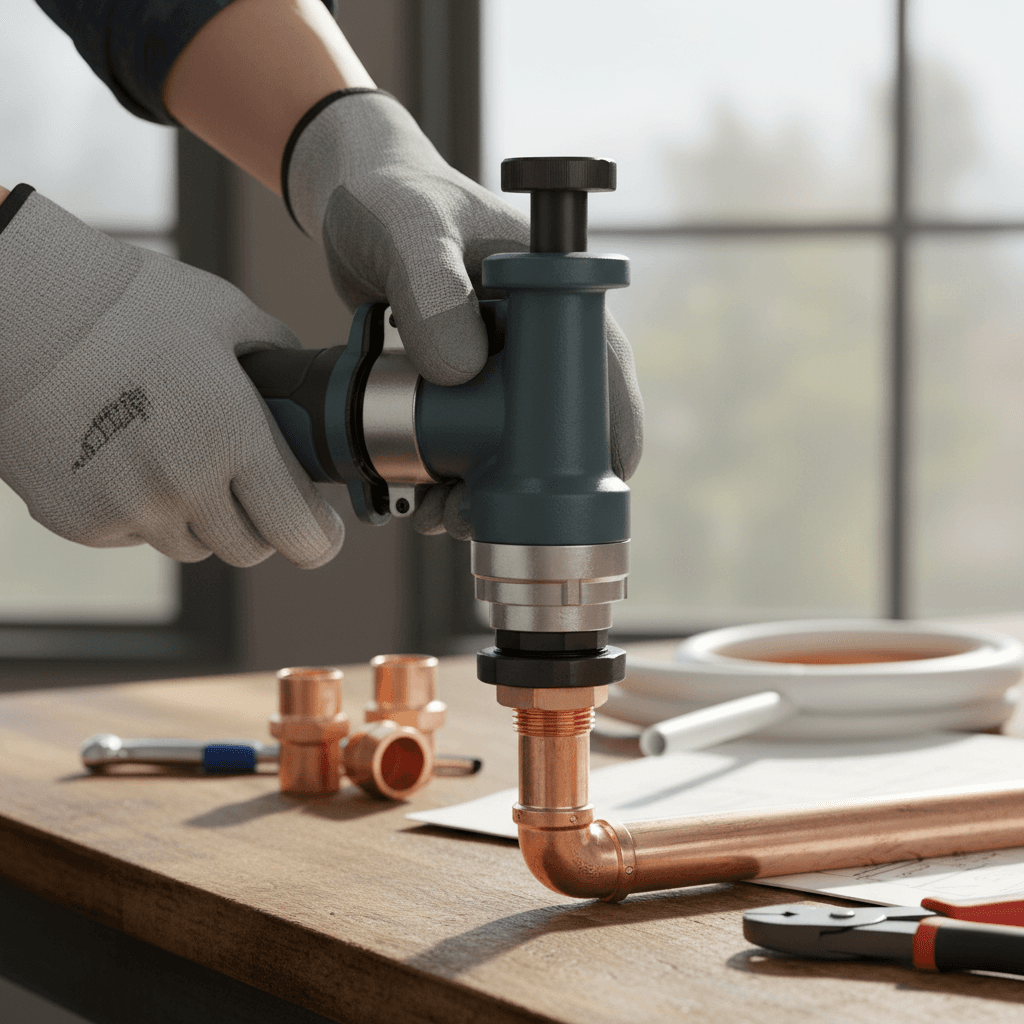
- Assemble
- Push the fitting on until it hits the internal stop and your depth mark disappears up to the line.
- Align Jaws
- Center the press jaws over the metal sleeve. Keep the tool straight. Misalignment causes uneven crimp.
- Press
- Hold the trigger until the cycle completes. Most tools finish in 3–7 seconds. Don’t stop mid‑press.
- Verify
- Check for a complete crimp around 360°. Confirm your depth mark location.
- Support The Line
- Add hangers. Follow spacing rules for copper (commonly 6–10 ft depending on size). Prevent stress on the joint.
- Pressure Test
- Cap and test. Many pros use 1.5× working pressure for 10–15 minutes. Follow your code and the fitting spec.
Skarkbite copper press fittings are fast when you keep this flow tight. Cut, deburr, clean, mark, press, test. Every time.
Common Mistakes And How To Avoid Them
Even veterans slip. Here’s what bites most crews on Skarkbite copper press fittings.
- Skipping Deburr
- Burrs slice O‑rings. Always ream inside and outside. No exceptions.
- Dirty Tube
- Oil and grit cause micro‑leaks. Clean with a nylon pad and wipe.
- No Depth Mark
- You can’t guess insertion depth. Mark it. Watch it.
- Misaligned Jaw
- Twisted jaws make partial crimps. Keep the tool square to the sleeve.
- Out‑Of‑Round Tube
- If the tube is oval, round it or replace the cut. Don’t press on bad stock.
- Pressing Over Damage
- Deep scratches in the seal zone are deal breakers. Cut back and redo.
- Rushing The Test
- A 2‑minute test misses slow weepers. Give it 10–15 minutes as required.
When you standardize these checks, Skarkbite copper press fittings are very dependable behind walls and ceilings.
Testing, Inspection, And Documentation
Your test and paperwork protect you when walls close up.
Test Methods
- Air or water per local code and spec.
- Use a calibrated gauge. Record starting and ending pressure.
- Many crews tag the manifold with date, pressure (e.g., 150 psi), and time.
Inspection Tips
- Photo each critical joint before close‑up. Shoot the depth mark and the full crimp.
- Log the fitting sizes used: 1/2 in, 3/4 in, 1 in, 1‑1/4 in.
Documentation And Client Communication
- Add test results to your job file with photos.
- For change orders on unexpected fittings, note the size and count.
- If you streamline proposals for press‑fitting upgrades, tools like Donizo can turn your site notes and photos into a branded proposal with e‑signature and one‑click invoicing.
If you’re also working to improve professional proposals and invoice templates, this pairs well with documenting your press work and test results.
Conclusion
Skarkbite copper press fittings help you work faster and cleaner without a torch. The formula is simple: prep the tube, mark depth, align the jaws, press, and test. Do that, and your joints hold. Next steps: 1) Standardize a press checklist for your crew. 2) Stock 1/2 in, 3/4 in, and 1 in fittings and matching jaws. 3) Document tests with photos on every job. When you quote press‑fitting upgrades or repairs, platforms such as Donizo make it easy to capture site details, send a branded proposal, get e‑signatures, and convert to an invoice in one click. Build this workflow now and protect your time and margin on every press job.