Introduction
On most pours, the edge is what the client sees first. If it’s rough, the whole slab looks sloppy. This guide walks you through Smooth Concrete Edge Finishing Like a Pro Clean Curve Technique. You’ll learn the tools, timing, and hand moves that create tight, rounded edges fast. We’ll cover when to start, how to hold the edger, and how to fix chips. Follow this and your edges will look sharp, smooth, and consistent. It works on patios, walks, and curved borders.
Quick Answer
Smooth Concrete Edge Finishing Like a Pro Clean Curve Technique means setting a firm radius with the right edger, at the right time, using short, overlapping passes. Start when the surface holds a 1/16–1/8 inch mark, run a 3/8 inch radius on patios (1/2 inch on drives), and blend with 2–3 light steel trowel passes.
Table of Contents
Key Takeaways
- Start edging when a fingertip leaves a 1/16–1/8 inch imprint.
- Use a 3/8 inch radius for patios; 1/2 inch for driveways.
- Keep blade angle low, around 10–15°, and use short strokes.
- Make 2–3 overlapping passes, then blend with light troweling.
- Protect the edge for 24 hours; do final rub after 7 days of cure.
Why Curved Edges Matter
Curved edges don’t just look good. They help the slab last. A rounded edge resists chips from foot traffic and carts. Water sheds better off a curve than a sharp corner. On site, this means fewer callbacks. It also makes broom finishing cleaner. Your broom lines stop neat at the radius.
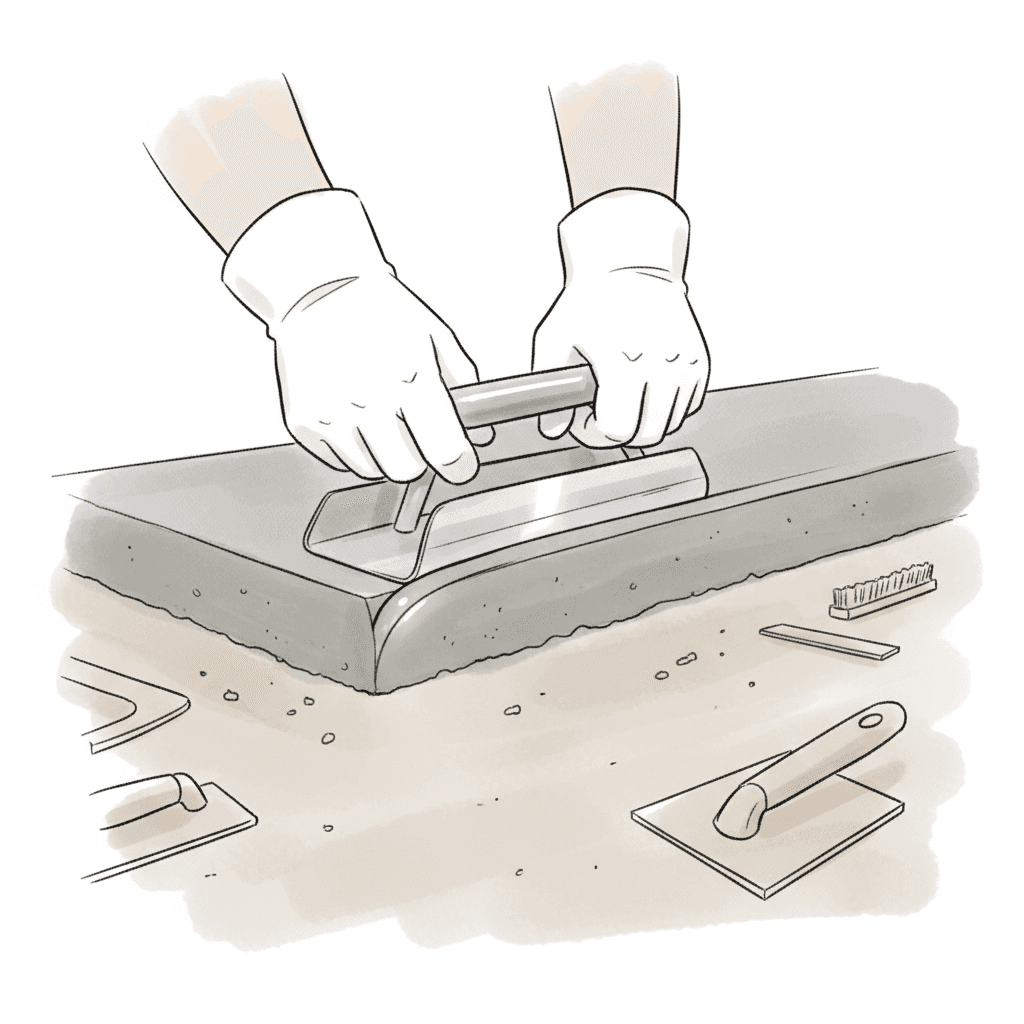
You can’t do Smooth Concrete Edge Finishing Like a Pro Clean Curve Technique without the right kit.
- Hand edgers: 3/8 inch radius for patios and walks. 1/2 inch for drives.
- Flexible edger for tight curves and radii under 24 inches.
- Margin trowel and pointing trowel for corners and touch-ups.
- Fresno or steel trowel for blending. Keep a 10–15° blade angle.
- Bull float for early leveling. Plan on 2–3 passes right after screeding.
- Spray bottle with clean water, and a small bottle of evaporation retarder.
- Rubbing stone for next-day smoothing.
- Mix targets: slump around 4–5 inches. Air temps between 50–80°F help.
Tip: For tight curves, cut foam or PVC templates to your radius. Set them as guides at the edge. They keep your path true.
Timing: When to Start Edging
Good timing makes the edge hold its shape. Start too early and it smears. Start too late and it chips.
- Watch the sheen. Start after bleed water is gone. This can be 5–15 minutes after bull floating in mild weather.
- Do the press test. Press a fingertip near the edge. You want a 1/16–1/8 inch imprint, not a puddle.
- Check support. The edger’s shoe should ride the surface without sinking more than 1/8 inch.
If it’s hot or windy, use a light evaporation retarder. Keep the surface from crusting while the inside is still soft.
Step-by-Step: Clean Curve Technique for Smooth Concrete Edge Finishing
Here is the exact move set for Smooth Concrete Edge Finishing Like a Pro Clean Curve Technique.
- Set the first pass
- Place the heel of the edger on the slab, toe on the form. Keep the tool flat. Start with the edger angled just 5–10° forward.
- Lock the radius
- Run a slow, 12–18 inch pass. Don’t push hard. Let the radius cut its path. Keep the shoe riding the surface.
- Overlap and extend
- Move back 6–8 inches and overlap the last pass by half. Keep strokes short around curves. Long passes wander.
- Feather the seams
- Flip to a steel trowel. With a 10–15° angle, make a light pass along the radius line. Two quick strokes blend it.
- Reset and repeat
- Make a second full pass with the edger. Same short overlaps. This sets the final curve.
- Touch tight radii
- For curves under 24 inches, switch to a flexible edger. Use 6–10 inch strokes. Keep pressure light.
- Clean corners and steps
- Use a margin trowel at inside corners and stair nosings. Shape with the same radius motion.
- Broom finish last
- Pull broom lines perpendicular to drainage. Stop just before the radius. Then lightly sweep over the curve once.
- Release and remove forms
- After 12–24 hours, ease the forms off. Don’t pry against the curve. Cut any bond line with a margin trowel first.
- Next-day rub
- After 24 hours, use a rubbing stone. Make 3–5 light passes to knock micro nibs without flattening the radius.
Pro move: Keep a damp sponge handy. A quick wipe after each edger pass removes fines and prevents build-up.
Common Mistakes and Fast Fixes
- Starting too early
- Symptom: smear marks and sand rolls. Fix: wait until only a 1/16–1/8 inch imprint shows, then re-edge.
- Overworking the surface
- Symptom: dark, slick paste and later scaling. Fix: limit to 2–3 edger passes and 2 light trowel blends.
- Chatter and ridges
- Symptom: ripples around curves. Fix: shorten strokes to 6–10 inches. Keep a steady, low angle.
- Aggregate pop-outs at the edge
- Symptom: pebbles show and tear. Fix: reduce pressure. If a stone lifts, lift it out, fill with paste from the margin trowel, re-edge lightly.
- Form drag lines
- Symptom: line where form stuck. Fix: run a margin trowel between form and slab before lifting. Next-day, rub 3–4 strokes.
Curing, Protection, and Next-Day Touch-Ups
Good curing keeps the curve strong.
- Cover or cure: Apply a curing compound once the sheen is gone, or cover with plastic for 7 days. Keep edges damp.
- Protect traffic: Block the slab for at least 24–48 hours from foot traffic. Longer for drives.
- Seal timing: Many contractors wait 7 days before sealing. Edges harden and look even after that window.
Pricing, Crew Roles, and Client Notes
- Pricing: For complex curves, add 5–10% labor to your base finish rate. Tight radii and stairs take time.
- Crew roles: One edges while one brooms. Swap every 10–15 minutes to avoid fatigue.
- Client notes: Offer radius options. 3/8 inch looks sleek on patios. 1/2 inch handles carts on drives better.
Related internal linking ideas you can use on your site:
- Link “professional proposals” to your proposal guide.
- Link “project timelines” to your scheduling article.
- Link “invoice templates” to a billing resource.
Conclusion
Clean, rounded edges sell the whole slab. Follow the timing test, use the right radius, and make short, overlapping passes. Then blend, cure, and protect. To turn this technique into clear client options and upsells, capture details and send polished proposals with tools like Donizo. Next steps: 1) Stock 3/8 and 1/2 inch edgers. 2) Train your crew on the 1/16–1/8 inch imprint test. 3) Add “edge radius” as a line item on every proposal. Do this, and your edges will look pro on every pour.